
TVS-Tutorials-Cutting a Sim from a Background
Tutorial 001 : 'Cutting' a Sim
Author: Christina
Purpose: 'Cutting' a Sim(s) from a solid colored background and achieving smooth edges! No nasty pixelation or choppiness!
Level: Beginner
Software: Photoshop CS4
Instruments Used: Wacom Tablet, PC (Desktop), Photoshop, & Sims 2.
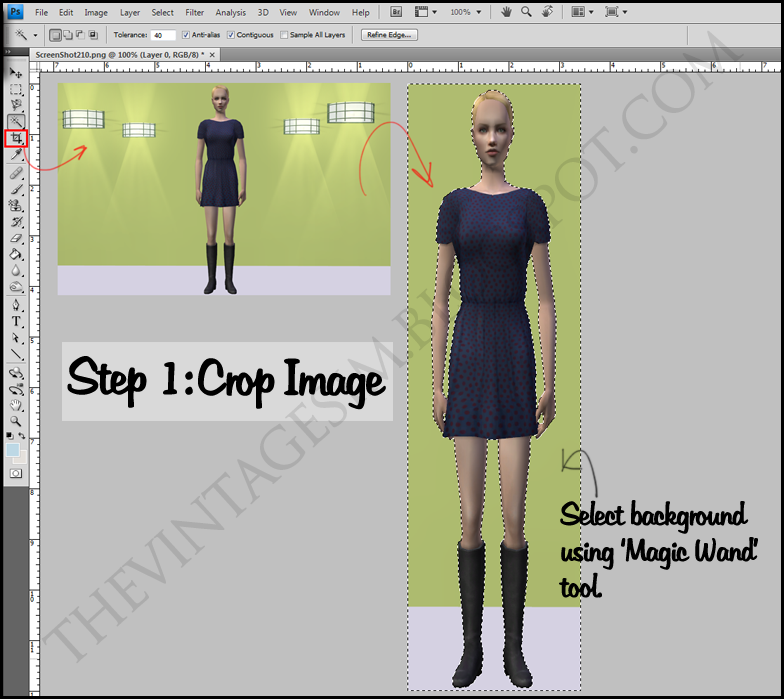
1. Crop the picture down to only the Sim and surrounding area. Also, select the area around the Sim using the magic wand tool.
Special thanks to Katie here, who willingly let me use her as a dummy for this tutorial.
Note: When choosing a background color for the wall, pay special close attention to the colors in your Sim's skin, clothing, and hair. Otherwise, using the magic wand tool later will be troublesome. Also, the lighting you see in the following picture is optional. I use a lighting mod so things tend to be dark in my game; hence, the lights.
Note: When choosing a background color for the wall, pay special close attention to the colors in your Sim's skin, clothing, and hair. Otherwise, using the magic wand tool later will be troublesome. Also, the lighting you see in the following picture is optional. I use a lighting mod so things tend to be dark in my game; hence, the lights.
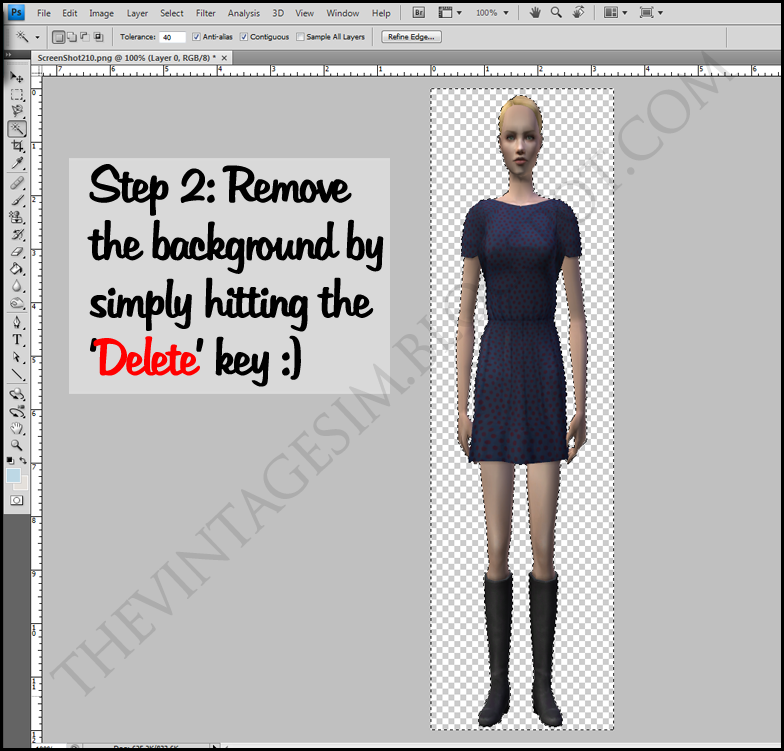
2. Remove the background by pressing the delete button. The area surrounding your Sim should now look like a white/gray checkered pattern.
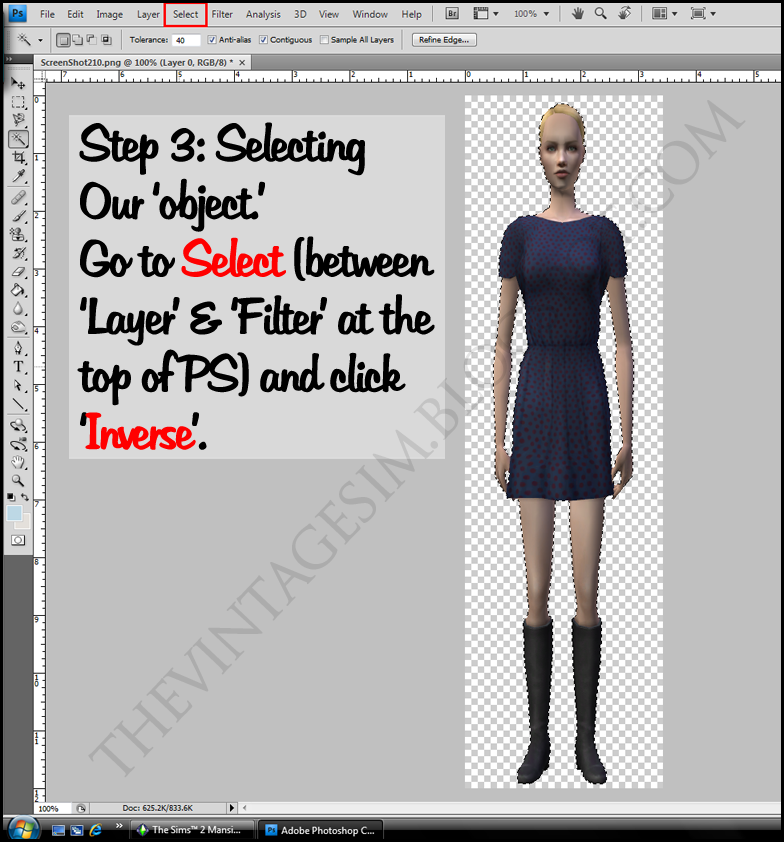
3. Select your Sim by going to Select -- Inverse.
Note: When selecting your object (the Sim) be sure to take note of the dashed line's position in relation to the contour of the Sim. In other words, you may need to bring in the dashed line 1 pixel. You can do this by Select -- Modify -- Expand -- 1px. This may or may not be necessary. Use your best judgement.
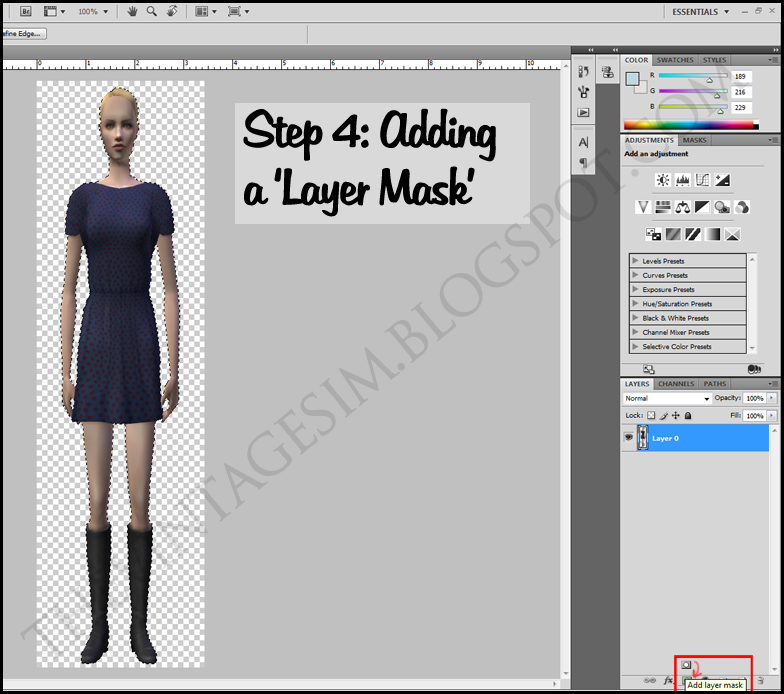
4. Add a layer mask. See red box below:
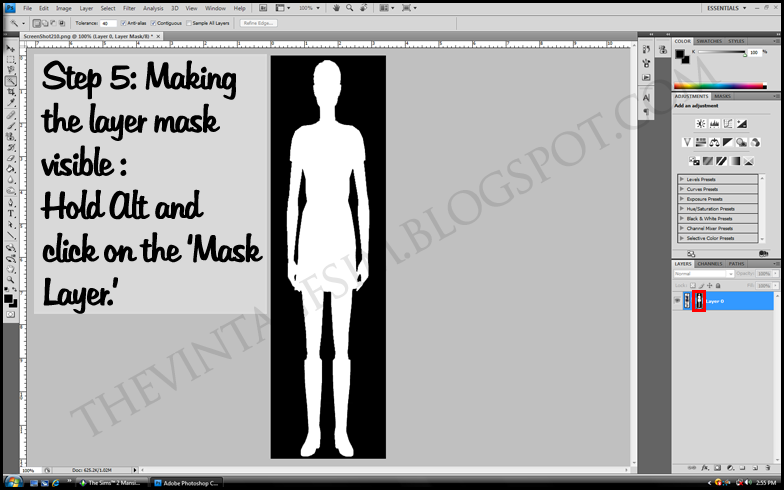
5. In order to make the layer mask visible (so that it looks like the image below), you must hold Alt and select the image in the red box (which is the layer mask):
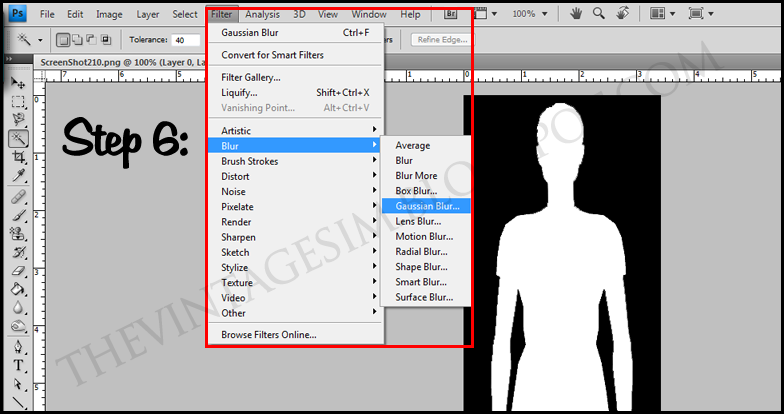
6. Apply a 'Gaussian Blur' to your mask layer. Go to Filter -- Blur -- Gaussian Blur...
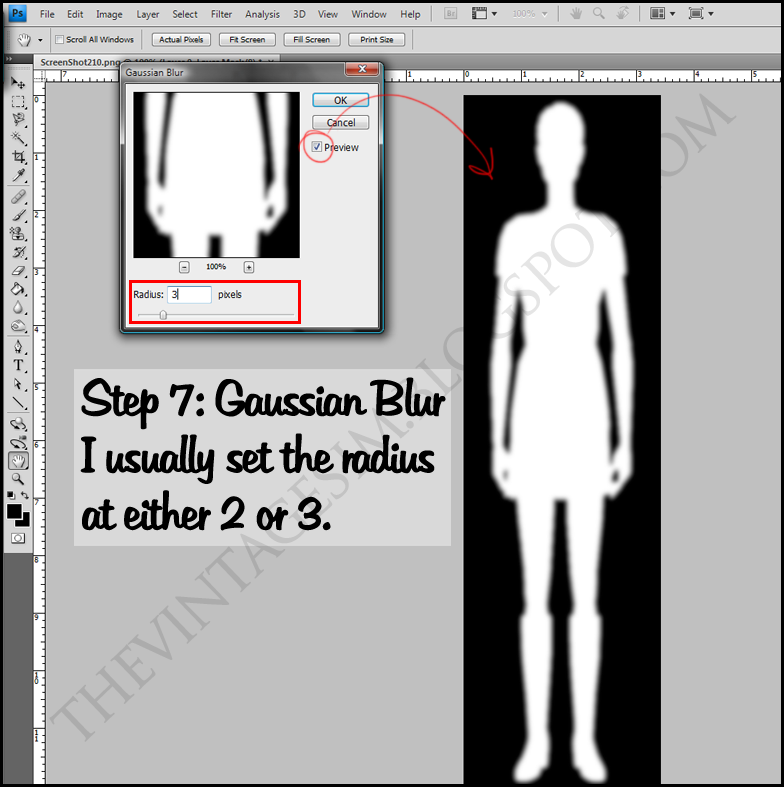
7. A window will pop up. Set the radius to 2 or 3. Click OK.
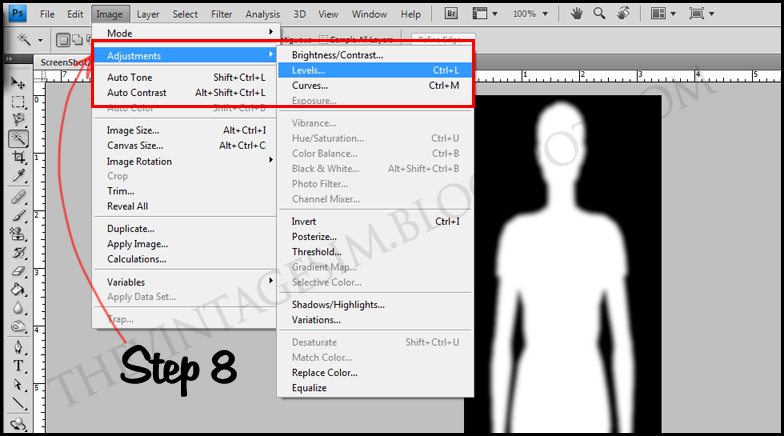
8. Next, go to Image -- Adjustments -- Levels...
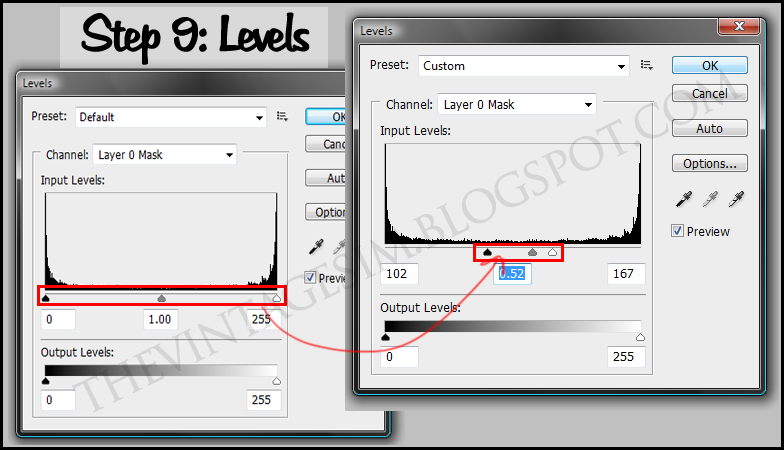
9. The general rule here is to bring the two farthest arrows (black & white) toward the middle. Make sure "Preview" is checked. You will see the contour of your object become more smooth. Use your best judgement here. When you're satisfied, click OK.
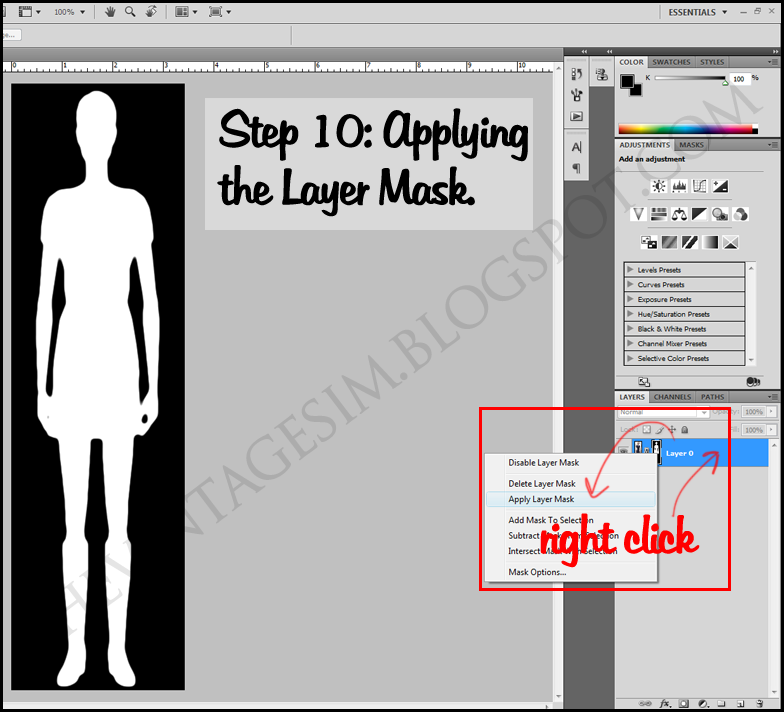
10. Right click on your layer. Click "Apply Layer Mask."
11. You will now see your Sim against a checkered background. At this point, my recommendation is to create a NEW LAYER, move it BELOW your current layer (the one with the Sim on it), and go to Edit -- Fill -- Black. Now you will be able to see if your edges are smooth enough.
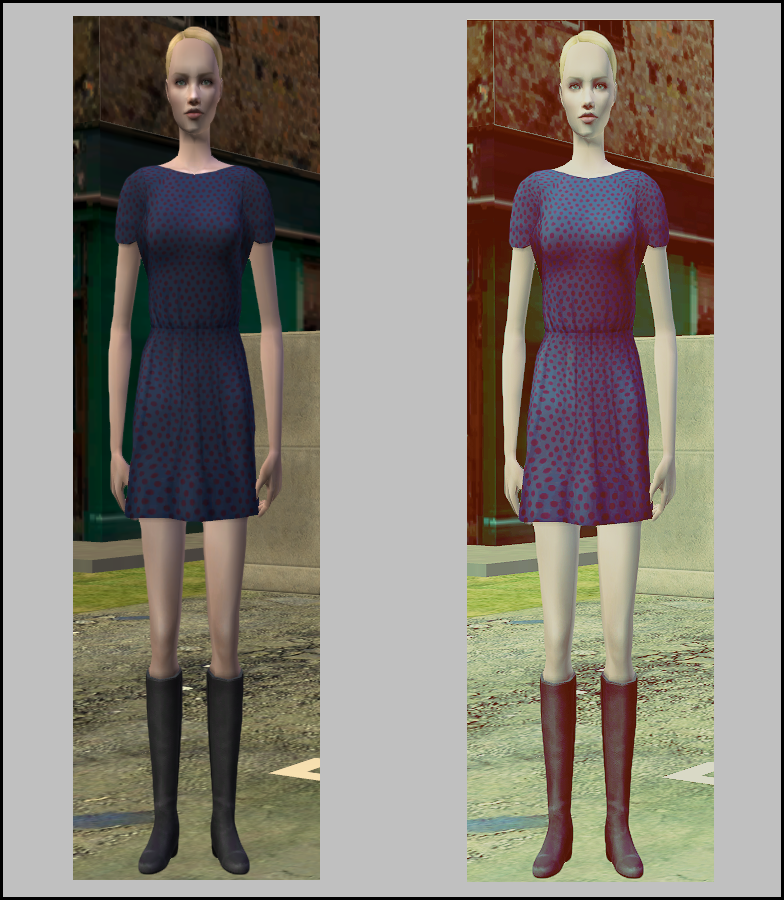
If you're satisfied, you can open up a new image, copy it, and paste it in with your Sim. Move the layers around appropriately and you could have an outcome like this:
I hope that many of you will find this useful. I know it's primarily good for doing things like contest shots, but I have always had trouble finding a legit, easy tutorial for this sort of thing. So, I made one myself.
Labels: Tutorial
7 Comments:
I gotta try this out tomorrow on my self sim. (I haven't forgotten! lol) Thanks for sharing this technique and I'll talk to you later! <333
March 31, 2011 at 12:33 AM
Thank you for this! I'd really love to try it. If I run into problems, I'll shout!
March 31, 2011 at 4:23 AM
Ashley && SB, I hope it works well for you guys..and I hope it makes sense. Of course, if you have any problems, you both know where to find me :)
March 31, 2011 at 8:48 AM
This is great, I'm going to be referring to this when I need it! Thanks Christina. :)
March 31, 2011 at 6:00 PM
Oh great! Thanks for the comment Jennifer!
April 1, 2011 at 9:14 AM
oh, haven't realized it would be easy as this. thanks for sharing!
October 19, 2011 at 12:01 PM
Np!!
October 22, 2011 at 3:06 PM
Post a Comment